I'm so excited and honored to be Guest Designing for Picket Fence Studios and sharing some awesome products from the new Whimsical Wonderland February Release. This is an amazing release with so many fun products. Let's get started.
Hello! For my first card, I have this shaped card that I created with the new Beyond Basics: A2 Scallops, Arches and Windows Cover Plate Dies. I love this set! The different dies can be mixed and match for so many combinations! As you can see, I used it several times for my cards.
For this card, I used the smallest scalloped arch and window combo to create a background for these gorgeous blooms from the new Hollycocks in Bloom set.
I used Tumbled Glass Distress Oxide ink to lightly ink blend the solid arch panel for a sky appearance.
I stamped the images from the absolutely gorgeous Hollycocks in Bloom stamp set onto a piece of Neenah Solar White 110 lb cardstock with Memento Tuxedo Black ink and used the coordinating Hollycocks in Bloom Dies to diecut them out. I colored them with Copic markers and highlighted them with a white gel pen.
COPIC COLORS:
Pink: RV10/21/23/25/29
Green: YG01/03/25/17
Purple: V01/04
Yellow: Y06
I stamped and diecut the Hello sentiment from the same set.
I adhered the layers as seen in the photos with a combo of liquid and foam tape for a bit of dimension and interest.
For the card base, I took a top folding card base and used the same scalloped arch die from the card front to create a shaped cardbase. I placed the scalloped die just above the folded edge so as to preserve a hinge between the front and back side of the card base. I adhered the card front to the cardbase with some liquid adhesive.
Have a Lucky Ducky Birthday! For my second card, I have this fun pop up boxcard that I created with the new Beyond Basics: A2 Scallops, Arches and Windows Cover Plate Dies for these super adorable ducks from the new Yuzu Nook You Are Quacktastic set. I cannot get over how cute these ducks are. I love the different body positions. So much character!
I stamped the images from the You Are Quacktastic stamp set onto a piece of Neenah Solar White 110 lb cardstock with Memento Tuxedo Black ink and used the coordinating Hollycocks in Bloom Dies to diecut them out. I colored them with Copic markers and highlighted them with a white gel pen.
COPIC COLORS:
For the boxcard, I used the two solid arch dies from the new Beyond Basics: A2 Scallops, Arches and Windows Cover Plate Dies to diecut the back part of the boxcars with white and teal cardstock. I used the same teal cardstock to cut a piece (1.25" x 10.10.5") fro the base. I scored and folded the strip at the 0.5", 2', 5.5" and 7" mark. For the shelves, I cut two strips out of white cardstock (1.5" x 4.5"). I scored ink blended these white strips with Mowed Lawn Distress Oxide ink. Then I scored and folded each end at the 0.5" mark to create tabs for the shelf to be adhered to the base. For the back shelf, I did trim off the upper half of the end tabs so that they wouldn't be visible.
I lightly ink blended the white arch panel with Tumbled Glass Distress Oxide ink.
For the sentiment, I stamped one of fun sentiments from the set onto a piece of white cardstock (1" x 3.25"). I also cut two pieces of white cardsctock (1" x 1.25") for the side panels.
I assembled the boxcard with a strong double sided tape. And adhered all of the colored images and white panels with liquid adhesive.
Thank You! I'm so lucky to have you in my life. For my next card, I have I created a clean and simple Thank You card using the beautiful Layering Flora: Heart of Vines Die.
This is such a gorgeous die that can be used in so many ways and for so many occasions.
I diecut the vine and flowers out of light pink and light green cardsctock. I lightly ink blended the flowers with some Picked Raspberry Distress Oxide ink for a bit of interest. I used an embossing tool to lightly curl the edges of the petals for some dimension.
I adhered the vine to a piece of white cardstock (3.75" x 5"). I stamped a sub sentiment from the Hollycocks in Bloom set directly onto the panel.
Next, I stamped the Thank You sentiment from the Hollycocks in Bloom stamp set with Versamark Watermark ink onto a piece of black cardstock and heat embossed with Detail White Embossing Powder. I used the coordinating Hollycocks in Blooms Dies to diecut it out.
I adhered a piece of craft foam to the back of the white panel before I adhered it to an A2 top folding pink cardbase (4.25" x 5.5").
I adhered the sentiment to the panel with some foam tape. I adhered all of the flowers with liquid adhesive. I finished the card with a little drop of yellow Nuvo Drop.
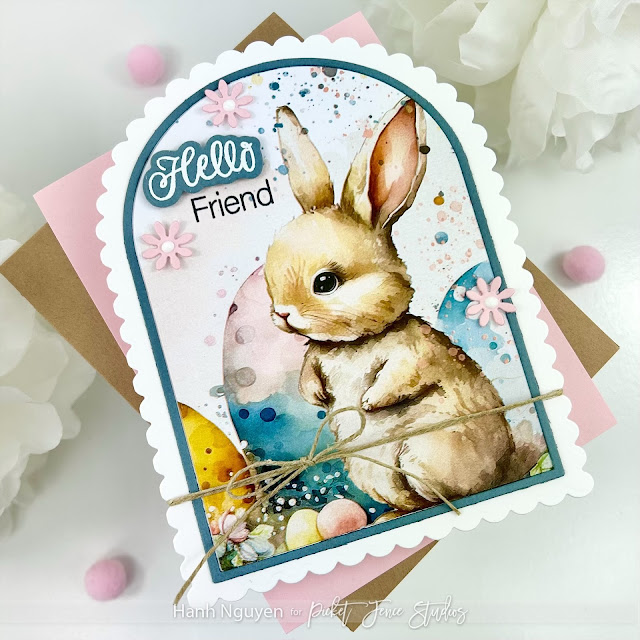
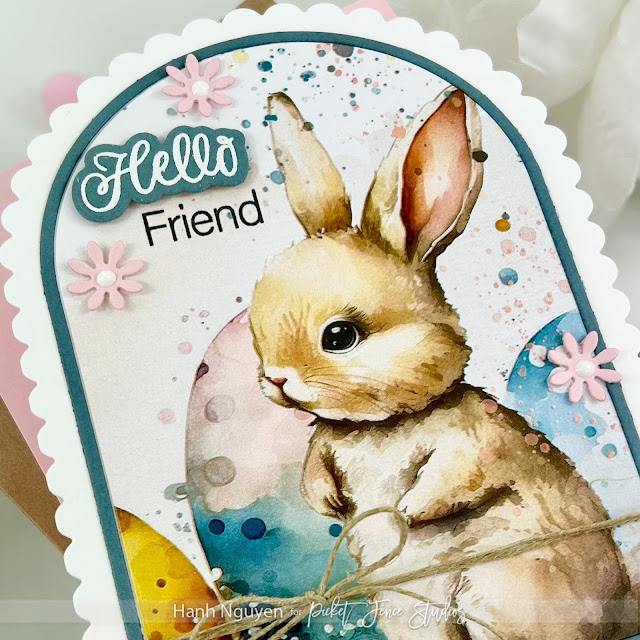
Hello Friend! My last card is a shaped card that came together very quickly. Picket Fence Studios has these awesome ready to go Fabulously Glossy A2 card fronts. This set that I used today is called Oh, So Cute Bunnies. I of course, had to make things complicated by re-inventing the card shape. Although I did make some changes, the pre-printed panels made this so quick and simple.
I used the new Beyond Basics: A2 Scallops, Arches and Windows Cover Plate Dies to trim the panel as well as diecut a larger scalloped panel and the thin border out of white and gray cardstock.
I stamped the word Friend from the Hollycocks in Bloom set directly onto the printed panel. Then, I stamped the Hello sentiment from the Hollycocks in Bloom stamp set with Versamark Watermark ink onto a piece of gray cardstock and heat embossed with Detail White Embossing Powder. I used the coordinating Hollycocks in Blooms Dies to diecut it out.
I diecut a few flowers from the Layering Flora: Hearts of Vines Die with a pink cardstock. Once again I curled the petals and added a white drop of Nuvo Drop to the center.
I assembled the layers and decorated as seen in the photos and added a piece of twine.
Once again, I created a shaped cardbase in the same manner as the first card. I adhered the panel with liquid adhesive.
Be sure to head on over to Picket Fence Studios to check out the entire release and all of the incredible inspirations!
I appreciate you taking the time to stop by and visit today. I hope you liked my cards. Please also visit my INSTAGRAM feed for more inspirations.
Have a wonderful and crafty day!
Hanh


Comments
Post a Comment