Hello Crafty Friends! They say April showers bring May flowers... well we're ready for flowers NOW so we've added some to our April release! 🙂 We also have products to help you celebrate Mom and Dad, or the other important people in your life with male & female themed sets and dies. With this release we are also adding more interactive die sets to our line - two new sets to easily create 3D pop up cards, as well as an interactive set to make a shutter inside your card. And of course there's our monthly mouse - for April, he's playing in the rain! Our release is full of fantastic new stamps, dies, embossing folders, CheerFoil, Foilables, patterned paper, and embellishments!
We are having an Instagram Hop and GIVEAWAY to celebrate this awesome release. Hop along with our design team and special guests for inspiration. Head on over to my Instagram Feed for more info and the full IG Hop Line up. We are giving away a $50 voucher to the shop. The lucky winner will be randomly selected from the comments left across our hop, so be sure to leave a comment at each stop for more chances to win!
Be sure to also visit our YouTube channel to get a tour of the entire collection with Michelle. Make your wishlist and get ready to get creative with our newest products!
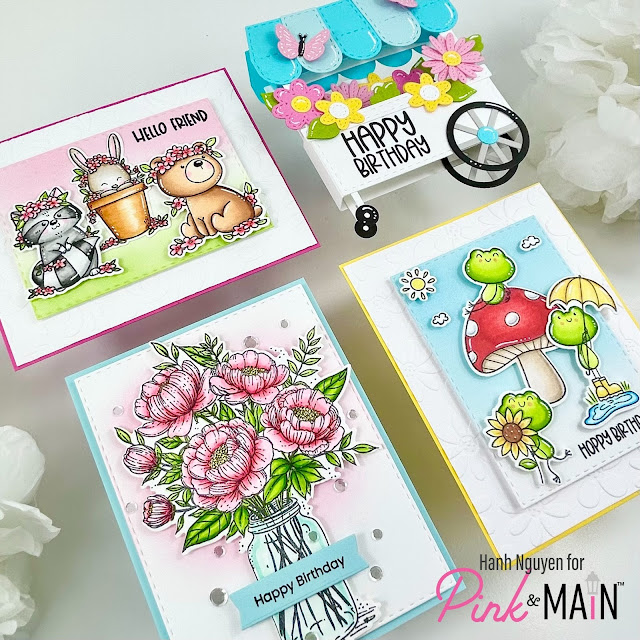
I had so much fun playing with release that I have four cards to share with you today. So let's get started.
Hello Friend! My first card features the adorable images from the new Critters With Flowers set and Swirly 6 x 6 Embossing Folder. Aren't these just the sweetest images? They completely stole my heart!
I stamped the images from the Critters With Flowers Stamp set onto a piece of Neenah Solar White 110 lb cardstock with Memento Tuxedo Black ink and used the coordinating Critters With Flowers Dies to diecut them out. I colored them with Copic markers and accented with a white gel pen.
COPIC COLORS:
Raccoon: T00/0/1/3/5/7, R000/20
Bunny: E40/41/42/43, R000/20
Bear: E50/51/53/33/35, R000/20
Pot: YR30/21/24/27
Flowers: RV000/10/21/13/14, Y06, YG01/03/17
For the background, I placed a piece of white cardstock (5 3/8" x 4 1/8") into the Swirly 6 x 6 Embossing Folder and ran it through my die cutting machine. I adhered this to a piece of pink cardstock (5.5" x 4.25"). I took a piece of Bristol Smooth cardstock and lightly inked with Spun Sugar and Mowed Lawn Distress Oxide inks. The panel was trimmed with the third largest die from the Stitched Rectangles Set 2 Dies. I stamped one of the sentiments from the stamp set directly onto the panel with Memento Tuxedo Black ink. I adhered a piece of craft foam to the backside of the panel before adhering it to the embossed panel.
I adhered all of the colored images with some foam tape for a bit of dimension and interest. Finally, I adhered the panel to an A2 white cardbase (5.5" x 4.25").
Happy Birthday! My second card features the amazing Flower Cart Pop Up Card Dies. What a fun surprise for the recipient to receive this 3-D pop-up card to celebrate their birthday. There's a special offer available right now. There's a FREE 3" x 4" stamp set available with the purchase of the Flower Cart Pop Up Card Dies. This is only available while supplies last so be sure to purchase and get this FREEBIE now!
The dies are super easy to use and assemble. I diecut all of the elements out of white and colored cardstock. I diecut two of all of the elements for the cart and awning in order to make a front and backside to my project. I assembled the awning, flowers with their centers and butterflies with their bodies and highlighted with a white gel pen.
For the sentiment, I stamped Happy Birthday sentiment from the More Spotlight Sentiments Stamp set directly onto one of the cart diecuts with Memento Tuxedo Black ink.
I really wanted a standalone pop-up design so I also trimmed a piece of white cardstock (9" x 1.5"), scored at the 0.5", 1", 4.75", 5.25" marks, folded and adhered the end tab to create a small boxcard structure to place inside the white cart portion of my project.
I trimmed off the end tabs on my white cart diecuts before adhering them to my boxcard structure. I adhered the top of cart top and awning (with connector tabs) before I decorated with the flowers and butterflies.
Happy Birthday! My third card features the beautiful new Jar of Peonies set. This is an absolutely gorgeous image.
I stamped the images from the Jar of Peonies Stamp set onto a piece of Neenah Solar White 110 lb cardstock with Memento Tuxedo Black ink and used the coordinating Jar of Peonies Dies to diecut them out. I colored them with Copic markers and accented with a white gel pen.
COPIC COLORS:
Flowers: RV000/10/21/13/14, Y06
Leaves: YG01/03/17
Jar: G0000 BG10
For the background, I took a piece of Bristol Smooth cardstock and lightly inked with Spun Sugar Distress Oxide ink. The panel was trimmed with the largest die from the Stitched Rectangles Set 2 Dies. I adhered a piece of craft foam to the backside of the panel before adhering it to a piece of light blue cardstock (4.25" x 5.5").
I stamped the Happy Birthday sentiment from the My Hero Stamp set onto a piece of light blue cardstock with Memento Tuxedo Black ink. I trimmed the sentiment out with one of the dies from the Large Sentiment Strips Dies.
I adhered the colored image and the sentiment strip to the inked panel with foam tape for dimension and interest. The panel was adhered to a white A2 card base (4.25" x 5.5"). I finished the card with a few Diamond Confetti Sequins.
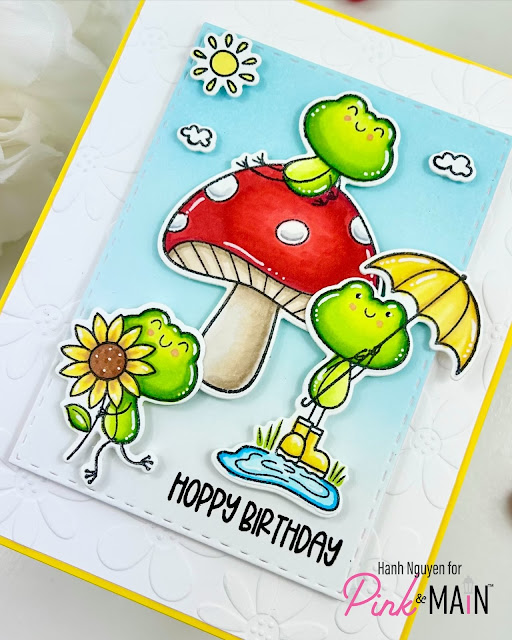
Hoppy Birthday! My last card features the adorable images from the new Fun Froggies set and Pocket Full of Posies 6 x 6 Embossing Folder.
I stamped the images from the Fun Froggies Stamp set onto a piece of Neenah Solar White 110 lb cardstock with Memento Tuxedo Black ink and used the coordinating Fun Froggies Dies to diecut them out. I colored them with Copic markers and accented with a white gel pen.
COPIC COLORS:
Frogs: YG00/01/03/17, R20
Mushroom: R22/24/29, E40/41/42/43
Umbrella: Y11/13/15 V12
Flower: Y11/13/15 V12, E33/35, YG01/03/17
Puddle: B000/00/02
Sun: Y13
For the background, I placed a piece of white cardstock (5 3/8" x 4 1/8") into the Pocket Full of Posies 6 x 6 Embossing Folder and ran it through my die cutting machine. I adhered this to a piece of yellow cardstock (5.5" x 4.25"). I took a piece of Bristol Smooth cardstock and lightly inked with Tumbled Glass Distress Oxide ink. The panel was trimmed with the third largest die from the Stitched Rectangles Set 2 Dies. I stamped one of the sentiments from the stamp set directly onto the panel with Memento Tuxedo Black ink. I adhered a piece of craft foam to the backside of the panel before adhering it to the embossed panel.

I adhered all of the colored images with some foam tape for a bit of dimension and interest. Finally, I adhered the panel to an A2 white cardbase (5.5" x 4.25").
The Pink & Main April Release and all of these new products are now available. For more ideas and inspiration, please visit Pink & Main and check out their entire April Release. Be sure to also head on over to Instagram to join the IG Hop to see all of the amazing inspirations and comment for a chance to win a $50 voucher to the shop.
As always, I appreciate you taking the time to stop by and visit today. I hope you liked my cards. Please also visit my INSTAGRAM feed for more inspirations.
Have a beautiful and crafty day!
Hanh


Comments
Post a Comment